Register Your Vehicle for Filming, Photography, Corporate work and Classic Car Hire Joy Ride Experiences.
Turn your car into a paid opportunity. Star Cars Agency connects vehicle owners with film productions, TV shows, commercials and media campaigns across Australia.
We also target the Classic Car Joy Ride Experience gift market.
Earn Money From Your Car
Production companies are constantly searching for authentic vehicles for movies, television series, TV commercials, photo shoots and brand activations.
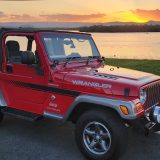
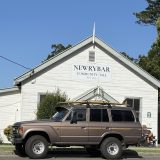
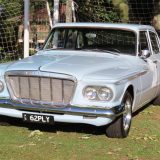
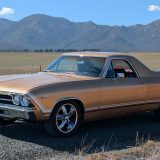
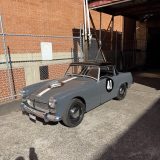
- Classic cars
- Muscle cars
- Prestige vehicles
- Supercars
- 4WDs, utes and trucks
- Modified and custom builds
- Vintage and period vehicles
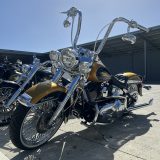
- Motorcycles and Scooters.
Vehicle owners can earn $500 – $1,000+ per day depending on the production and vehicle type.
Why List Your Vehicle With Star Cars Agency?
Free Vehicle Registration
There are no upfront costs to list your vehicle in our national production database.
Access to Film & Media Clients Australia-Wide
We work with production companies throughout Australia.
Flexible & Owner Controlled
You approve every booking and set your availability preferences.
All Vehicle Types Considered
From concours classics to everyday vehicles and restoration projects — productions need realism and variety.
How to Register Your Vehicle
Step 1: Create Your Free Account
Register using your email address and activate your account.
Step 2: Add Your Vehicle Details
Include make, model, year, colour, location and special features. Use descriptive titles like:
“1971 Ford Mustang Fastback – Classic American Muscle Car”
Step 3: Upload Quality Photos
Upload clear exterior and interior images. Well-lit, high-quality photos increase booking enquiries.
Vehicles in High Demand for Film & TV
- Classic Australian cars
- American muscle cars
- European prestige vehicles
- Vintage trucks and vans
- Police-style vehicles
- Period vehicles (1960s–2000s)
Frequently Asked Questions
Is it free to register my vehicle?
Yes. Listing your vehicle with Star Cars Agency is completely free.
Do I have to accept every job?
No. You approve each booking before confirming.
Is my vehicle insured during filming?
Production companies typically provide insurance coverage while your vehicle is engaged.
Can I stay with my vehicle during filming?
Yes. Many owners remain on set when their vehicle is used.
Start Earning From Your Vehicle Today
Your car could be exactly what a production company is searching for.